File Browser Options Node
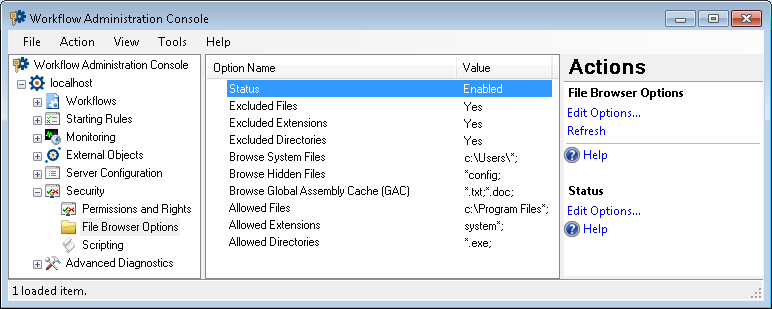
The File Browser node, under Security in the Workflow Administration Console, lets you configure whether Workflow users and activities are allowed to browse the Workflow Server's file system. You can specify which directories, files, and extensions are allowed or excluded.
Note: File browsing must be enabled to browse the Workflow Server local disk. You may want to browse for files when attaching a file with the Attach Electronic Document activity, when configuring data sources, and when looking for script references with the Script and SDK Script activities.
To open this node
- In the Workflow Administration Console's Console Pane, expand the Security node.
- Select File Browser Options. The node will list what file browsing options are enabled or disabled.
Tip: You can refresh this list to reflect recent changes by clicking the Refresh link below File Browser Options in the Actions Pane. Alternatively, right-click the File Browser Options node and select Refresh.
To enable/disable file browsing
- In the Console Pane, select File Browser Options.
- In the Actions Pane, select Edit Options.
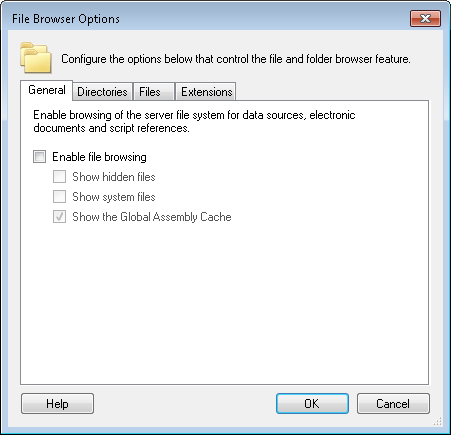
- In the
 File Browser Options dialog box, select the General tab.
 - Select Enable file browsing. Clear this option to disable file browsing.
- Optional: If you enable file browsing, you can choose to show or hide hidden files, system files, and the Global Assembly Cache.
- Click OK.
To specify which directories, files, and extensions can or cannot be browsed
- In the Console Pane, select File Browser Options.
- In the Actions Pane, select Edit Options.
- Select the Directories, Files, or Extensions tab.
- Next to the Allowed list box, click Add and type a directory, file, or extension (depending on what tab you chose in step 3) that you want to allow browsing for in the box that appears. Use the * character to specify wildcards. Click Add again to list additional directories, files, or extensions.
- Next to the Excluded list box, click Add and type a directory, file, or extension (depending on what tab you chose in step 3) that you want to deny browsing for in the box that appears. Use the * character to specify wildcards. Click Add again to list additional directories, files, or extensions.
- Optional: To remove an item from either the Allowed or Excluded list, select the item and click Remove next to the relevant box.
- After configuring all desired tabs, click OK.
Note: If you do not specify any directories, files, and/or extensions as allowed, all items in that category will be allowed unless explicitly specified in the Exclude list box. As soon as you specify a directory, file, and/or extension as allowed, all other items in that category will be excluded. ![]() Show me an example.
Show me an example.
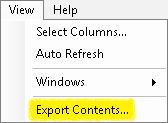
To export the contents of this node in a .csv, .xml, or .txt file
- Select the node in the Console Pane.
- Select View from the main menu.
- Click Export Contents.
- In the Export data dialog box, name the exported file.
- Select CSV File, XML File, or Tab Delimited Text File from the drop-down menu.
- Click Save.